Ten Beautiful Pinterest DIY Christmas Decor Crafts For $25--TOTAL  

Posted by Heidi

 
A few weeks ago I challenged myself to find a handful of Christmas décor Pinterest projects that I could complete with items that I already had in my craft drawers (and cupboards and cubbies).  I knew it was unrealistic to believe I would have absolutely everything I would need so I allowed myself about $25 for the ten projects that I chose.  Naturally, I chose items that I knew I could do for very little but if I had bought everything needed for these projects, it would have cost at least ten times what I spent. Some of them turned out great and others are, well . . . uuummm . . . interesting.  I have provided the link to the sites where the projects were pinned from so you may see for yourself how I did (or to see how it was meant to be done in the first place!). 


This first one pictured is my GLITTER HOUSES  project (red letters in caps represent the link to the original project).  All I needed to purchase for this item were the dollar store ceramic buildings. I bought five for $1 each.  The instructions I read indicated that the crafter used glue for the glitter.  I just used paint--it stuck fine.  I also added fake snow to the parts of the buildings that had snow on the original piece--it was molded rather than just painted white so it was easy to see where to add the snow even when the whole piece was painted. 

 
I also added the white lights (on a white cord) under the felt snow which I think adds a very magical touch and helps to make the glitter . . . well, glitter!

 
Next is my SHABBY CHIC BOTTLE BRUSH TREE (be sure to check out this whole post--many gorgeous pinnable pics!).  This cost me absolutely nothing.  I love miniatures and have been collecting little things for many years.  I was the original Shabby Chic Queen of miniature furniture and sold my painted and distressed doll furniture on eBay for surprising amounts of money.  However, it wasn't long before others came along and started doing the same thing and I went onto other passions (mainly writing Jane Austen-era romances).  I adore how this tree  turned out and especially love the little silver piece just above the gold ball at the bottom.  It looks like a bell--there's another just above the second strand from the bottom of the pearl garland.  These were findings on a pair of earrings.  Once you start looking around, you might be surprised at how much you already have to make one of these sweet little trees (including the tea cup minus the saucer). 


This was the first project I did.  The original post for these LIGHTED SNOWGLOBES pictured the globes from the side and the back was cut off so that the cords were not visible.  However, the instructions do include a strand of lights--which looks tacky.  I have thought about it a lot and have decided there are really only two other practical alternatives:  battery operated votive candles (which must be buried in the snow to give it that magical look) that have a very long life (as in, hundreds of hours) or ones that have timers so that they go on and off without having to take the whole thing apart twice a day.  I have learned not to see the cords, even when the shifting snow ($7 for a bag--the only thing I bought specifically for this project) exposed them days after it was complete.  You might also notice that the lids don't really fit well with the cords going over the rim.  This is one reason that I tied on the mercury glass hearts--to keep the lids down.  Also the apothecary jar on the right has a broken foot--but the challenge was to use what I already had.  In spite of its imperfections, the Santa one is my favorite. 

 
The Santa is a Jim Shore Christmas tree ornament and is one of my favorites of all time.


The BELIEVE SIGN (scroll down a bit to find the photo that was pinned) is cute but not as cool as its inspiration.  I bought the bird pick at the dollar store and the ribbon was left over from a project from another time.  I found the wood out in the garage and my daughter and I hunted through fonts, typed in the word BELIEVE, and printed it up.  We then cut out each letter (you only have to do one "e" so it's not as time intensive as it might seem) and traced around them in order to fill in with paint.  We edged the letters with a black sharpie.  (I realize that it appears that the letters get smaller as you read down but that is due to the angle at which the photo was taken.)  So, yes, this cost $1--and it rather looks like it, too.


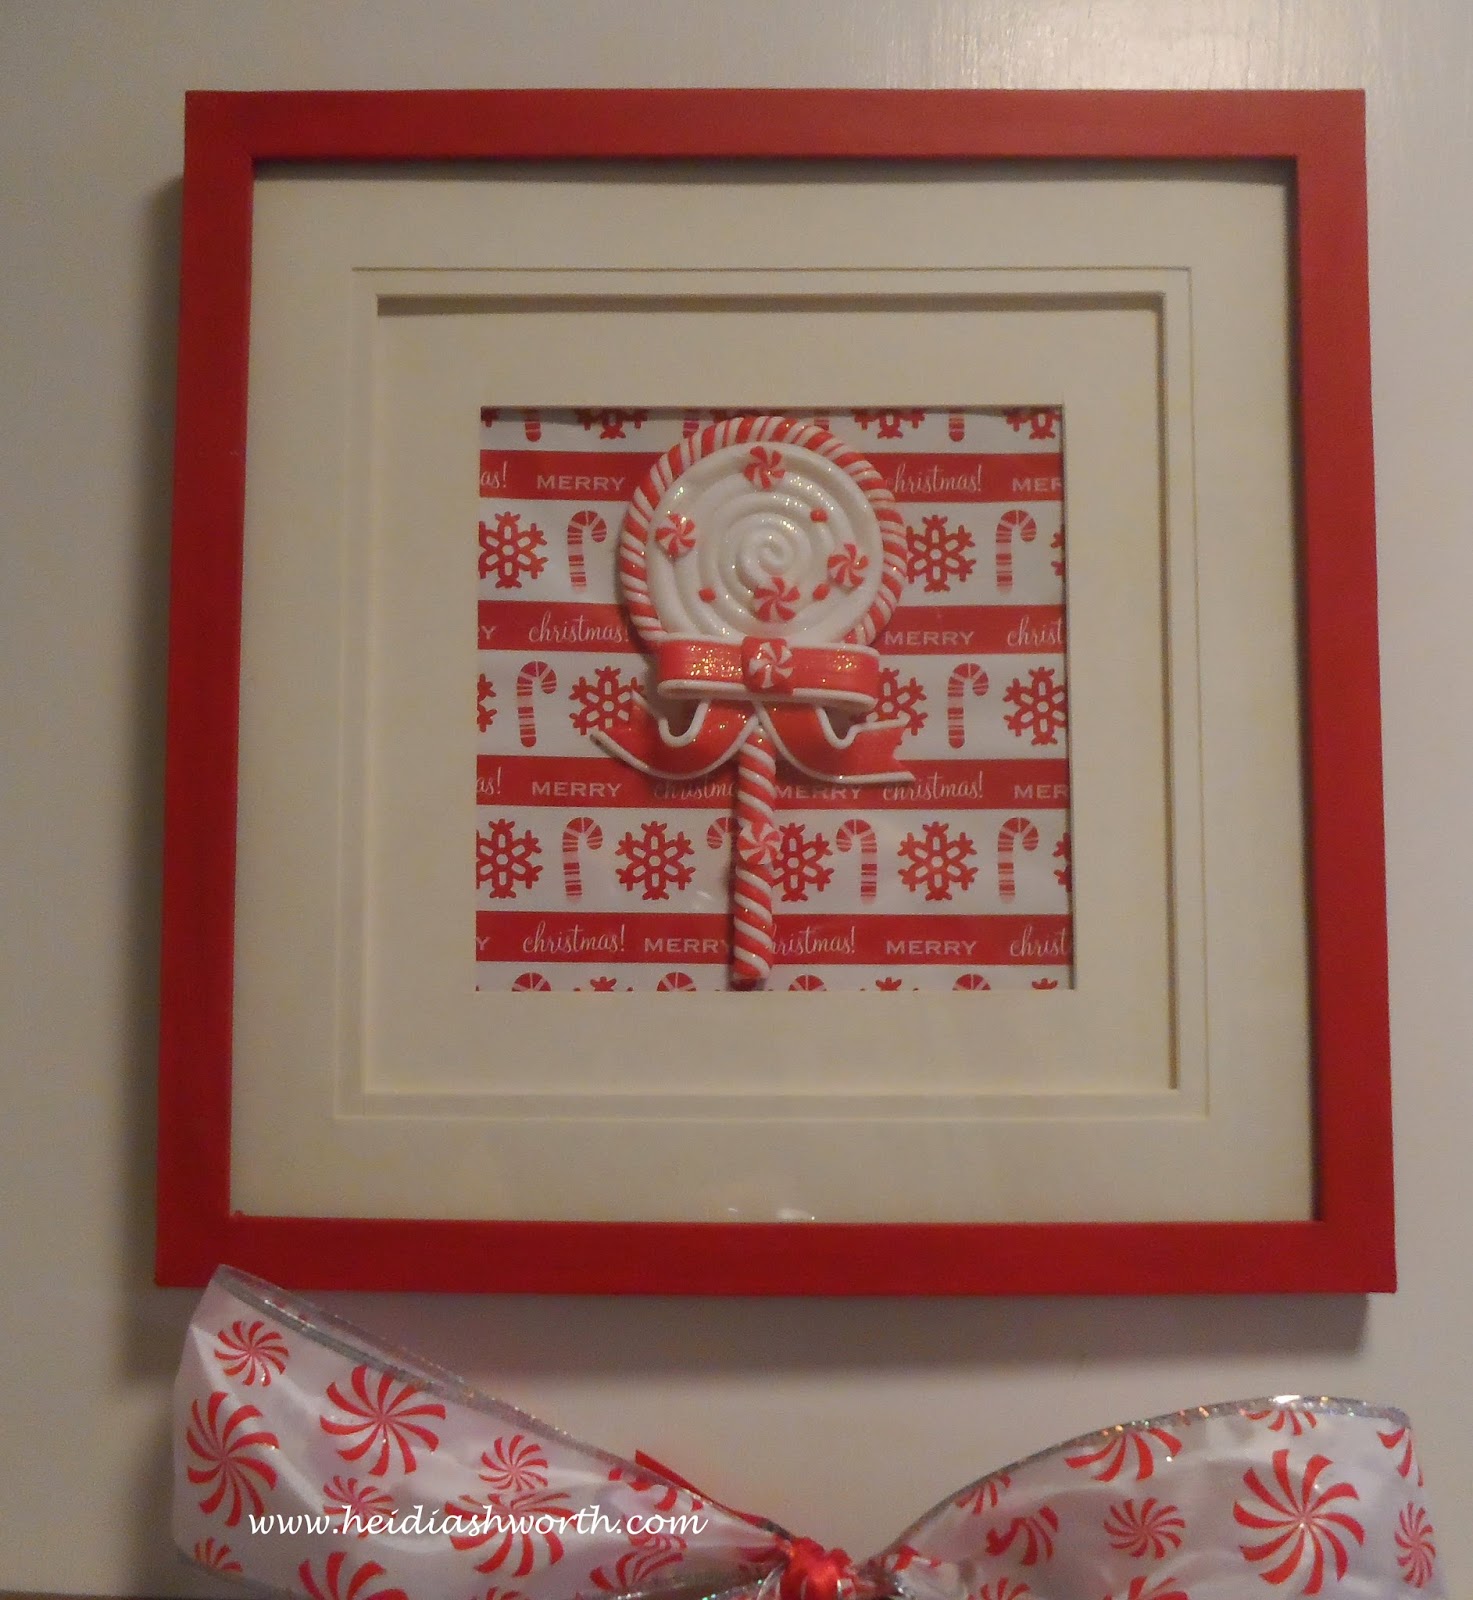
This brings me to the fact that I have been a bit obsessed with red and white the last few Christmases.  I made this candy cane hanging with a frame from the dollar store (which I painted) and last year's wrapping paper and an ornament that was on one of my packages last Christmas.  I think it is quite adorable.  (I can't find the Pinterest photo that inspired this one--oops!)


More red and white:  One can find hundreds of Pinterest photos extolling the versatility of mason jars so I won't bother to link to any.  This was more a matter of expediency:  where to put the votive candles I had bought for the holiday season?  A bit of left over snow from the globe project and ribbon I had in the drawer and this jar became a vision in red, white and silver. 


This RED LANTERN with bottle brush tree project is another example of the less than great.  This lantern, originally black, has been sitting on my porch for years.  I sprayed it red in the few hours before a huge rainstorm headed our way.  A warning to the wise:  one shouldn't spray paint in damp weather.  It dripped a whole lot in some places and got gummy in others.  The bottom of the inside didn't dry for days.  It was also expensive--I did already have the spray paint and the snow but the tree (which is adorable) was a $7 purchase for this specific project.  (I think I am going to regret the loss of my black lantern.)


I do quite love this lace Christmas tree.  (As it turns out, this one was inspired by a photo of an auction on eBay, one that is no longer searchable.) It cost me absolutely nothing and was super easy.  I merely covered the cardboard backing of a frame that already hung on my wall (it held a family photo and will again when Christmas is over) with sweet fabric from my stash, and gathered each piece of lace with a needle and thread.  I then pinned the lace to the fabric.  It really adds a lot to my shabby chic wall above my desk.  Its inspiration was more elaborate and had bits of costume jewelry as stand ins for the star and trunk of the tree. 


 The BASKET OF LOGS (see below) is certainly one of my most questionable projects.  I adored the look of it in the photo I saw and was thrilled when I realized I had almost the exact same basket in the garage.  I painted it to make it darker and happily tossed in the greenery and berries I already had, as well.  I added a string of battery operated flickering lights which is very reminiscent of an actual fireplace (something I don't have) but I was stumped when it came to the logs.  The ones in the photo are from a fir or pine tree and we use an artificial tree.  So I finally rolled up magazines and catalogs (we all have plenty of those this time of year), wrapped them in brown paper (it arrived in a package just in the nick of time), secured each with a rubber band nearer the bottom than the top so they would be hidden by the greenery, and drew bark on them with a sharpie.  When it is darkish and the lights are flickering, it looks pretty authentic.  Honest.


At least it was free!  Last is the darling LIGHTED HOUSE on the silver serving tray.  This one was also absolutely free and came together in a couple of minutes.  I just needed some inspiration to make it shine.  What could you make with what you already have? 
Merry Christmas!

This entry was posted on Friday, December 12, 2014 at Friday, December 12, 2014 . You can follow any responses to this entry through the comments feed .

1 wise, witty and wonderful comments

Oh my goodness! I would love to live in your red and white Christmas! I wouldn't dare touch or turn around : ) My favorite was the Heaven is within sign!

January 9, 2015 at 7:44 AM

Post a Comment